This post will guide you how to lock and protect the selected cells in your worksheet. How do I lock cells in Excel.
By default, all of cells in your worksheet are locked. So if you want to lock the range of cells or the selected cells in your current worksheet. How to achieve it. You need to unlock the all of cells firstly, then select the range of cells that you want to lock. Then lock those cells. Let’s see the below detailed steps:
#1 press Ctrl +C to select all cells in your worksheet.
#2 right click on the selected cells, and select Format Cells…from the drop-down menu list. The Format Cells dialog will open.
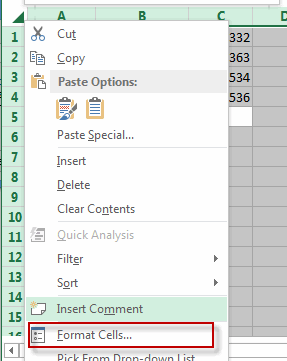
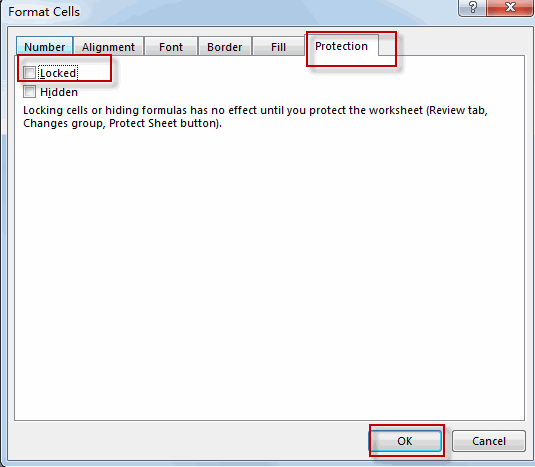
#3 switch to the Protection tab, and uncheck the Locked checkbox, and click OK button.
#4 select the range of cells that you want to lock and protect, and right click on it and select Format Cells again from the drop-down menu list.
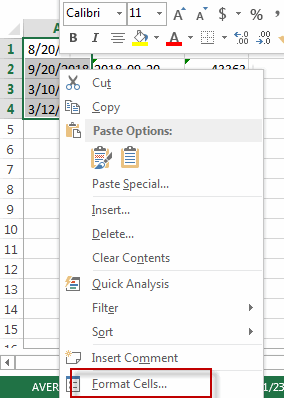
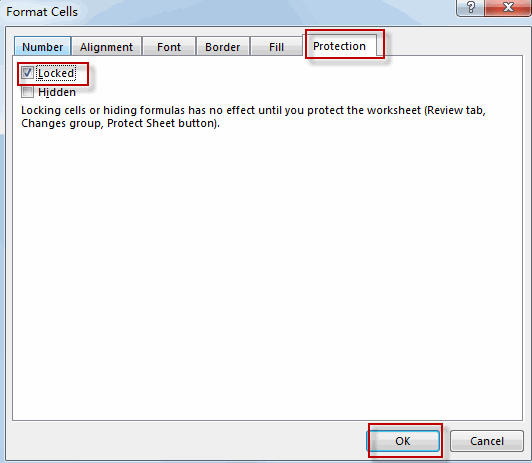
#5 switch to the Protection tab, and check the Locked checkbox, and click OK button.
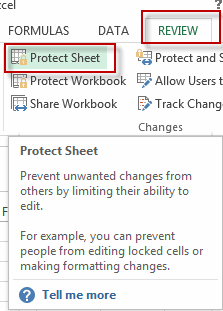
#6 go to REVIEW tab, and click the Protect Sheet command under Changes group. The Protect Sheet dialog will open.
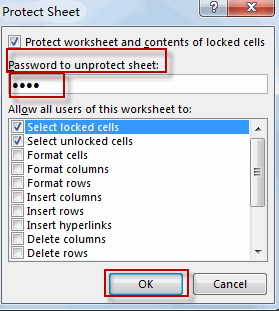
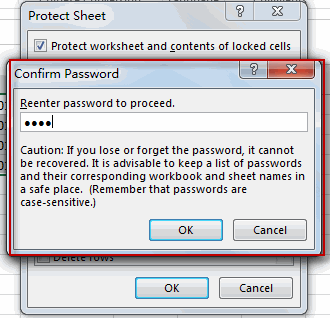
#7 type a password into the Password to unprotect sheet password box. And reenter password to proceed. Click OK button.
Now the selected cells have been unlocked and protected.
Leave a Reply
You must be logged in to post a comment.