This post will guide you how to limit rows and columns in an Excel Worksheet. How do I limit the number of rows and columns in an Excel Spreadsheet.
Table of Contents
1. Limit Rows and Columns with VBA
Assuming that you have a worksheet, and you want to allow other people to edit your worksheet only, but you do not want them to add more rows or columns. So you need to limit the number of rows and columns in your worksheet. You can temporarily prevent other people from scrolling below a certain row and column. And how to disable scrolling below a specific row and column, you can use the Scroll Area property of the worksheet to limit the range of usable rows and columns. Just do the following steps:
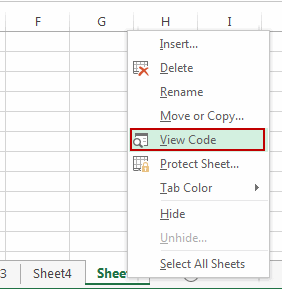
#1 right click on your worksheet tab at the bottom of your worksheet. And click View Code menu from the popup menu list. And the Visual Basic for Applications window will open.
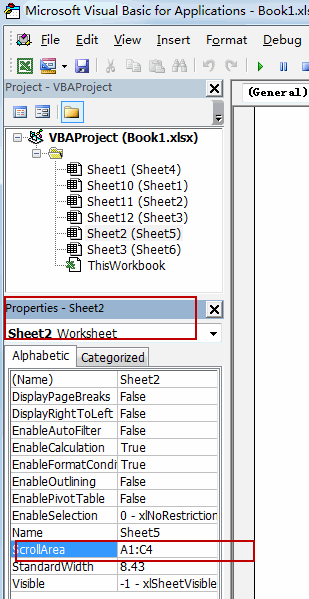
#2 click View Menu in the Visual Basic for Applications window, and then click Properties Window menu from the drop down menu list. And the Properties window will be shown.

#3 Find the Scroll Area property in the list of worksheet properties.
#4 click in the empty box to the right of the Scroll Area label. And type the range of cells that you want to display.
#5 press Ctrl + S keys and save the worksheet. And then close the Visual Basic for Applications window and return the worksheet.
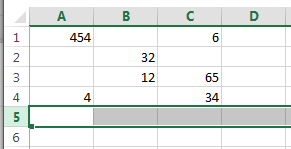
#6 you will be unable to scroll past the row number you typed into the scroll Area text box. And all other rows are also be locked.
2. Limit Rows and Columns with Hiding Rows and Columns
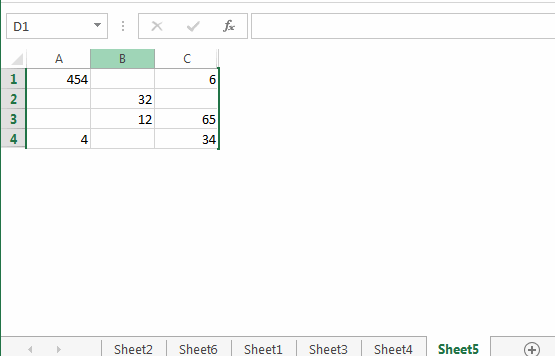
You can also try to hide all other rows and columns to achieve the same result of limiting rows and columns in your worksheet. For example, If you need to hide the rows and columns outside the range A1:C4, just do the following steps:
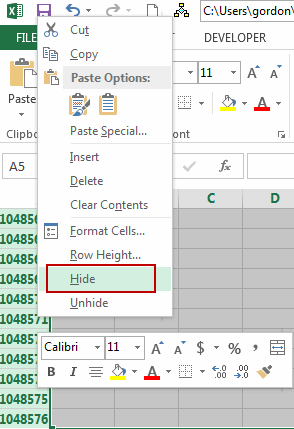
#1 click the row 5 to select the entire row.
#2 press Shift + Ctrl + Down Arrow keys in your keyboard, to select all rows from row 5 to the bottom of the worksheet.
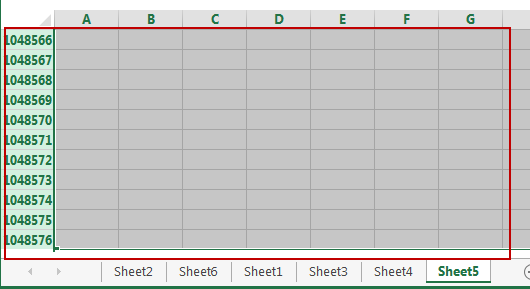
#3 right click on the selected rows and choose Hide from the popup menu list.
#4 click on the Column D to select the entire column. And press Shift + Ctrl + right Arrow keys in your keyboard, to select all rows from row 5 to the bottom of the worksheet. Then repeat step 3 to hide all columns after column C.
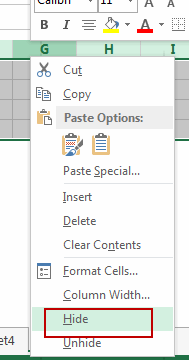
#5 You will see that all rows and columns outside the range A1:C4 will be hidden.
3. Video: Limit Rows and Columns
This Excel video tutorial where we’ll explore effective methods to limit rows and columns: the conventional ‘Hiding Rows and Columns’ feature and the more dynamic ‘VBA’ method.
Leave a Reply
You must be logged in to post a comment.