In our work we often need to insert or update entire row or column data into several different sheets. For example, for recording score or consumption, we usually have a main sheet to record the Total or Summary, and following sheets save the details like each student’s score or one production’s consumption. So when we update the total, how can we update the other sheets conveniently without inserting data or update data one by one?
This article will introduce you one method to copy entire row to another sheets by Macro. If you have coding experience you can choose VBA Macro, or you can record Macro to implement the function without any coding.
Initial Condition
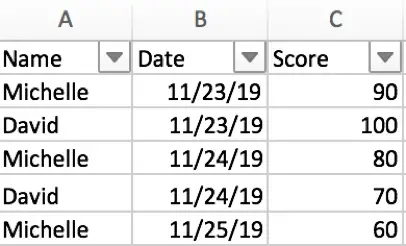
First, we need to prepare a MAIN SHEET to save all students’ name, date and score. Then prepare a COPY SHEET to save each student’s score.
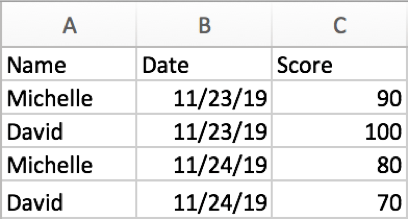
MAIN SHEET and COPY SHEET ‘Michelle’.

Copy Entire Row into Another Sheet by Macro
Now follow below steps, let’s get started to learn how can we insert entire row from main sheet into copy sheet OR update both sheets by Macro.
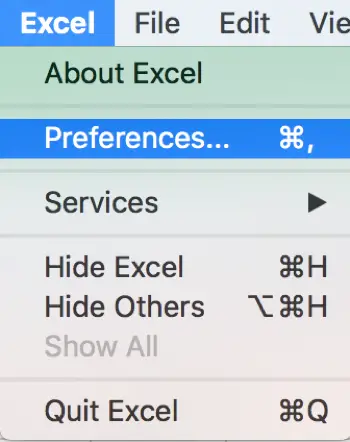
Step 1. First we need to enable Developer.
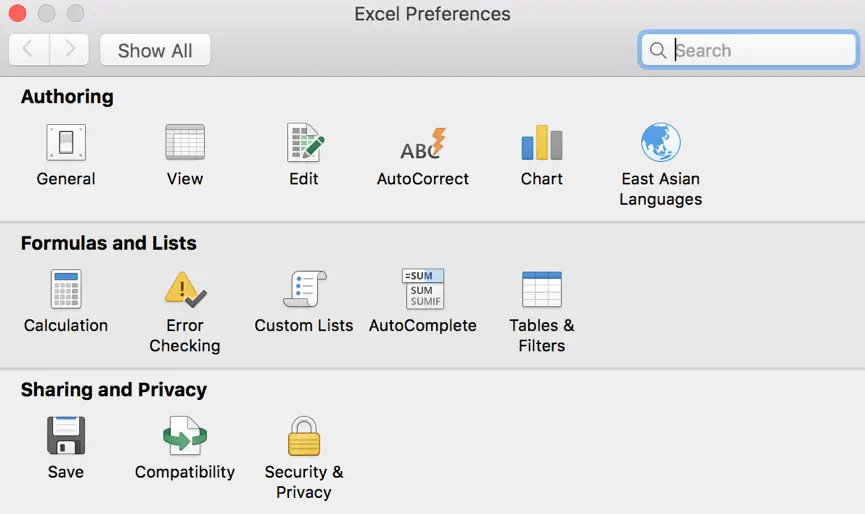
a. Click on Excel->Preferences to enter Excel Preferences window.
b. Click on View under Authoring.
c. Check on Developer tab option under In Ribbon, Show.
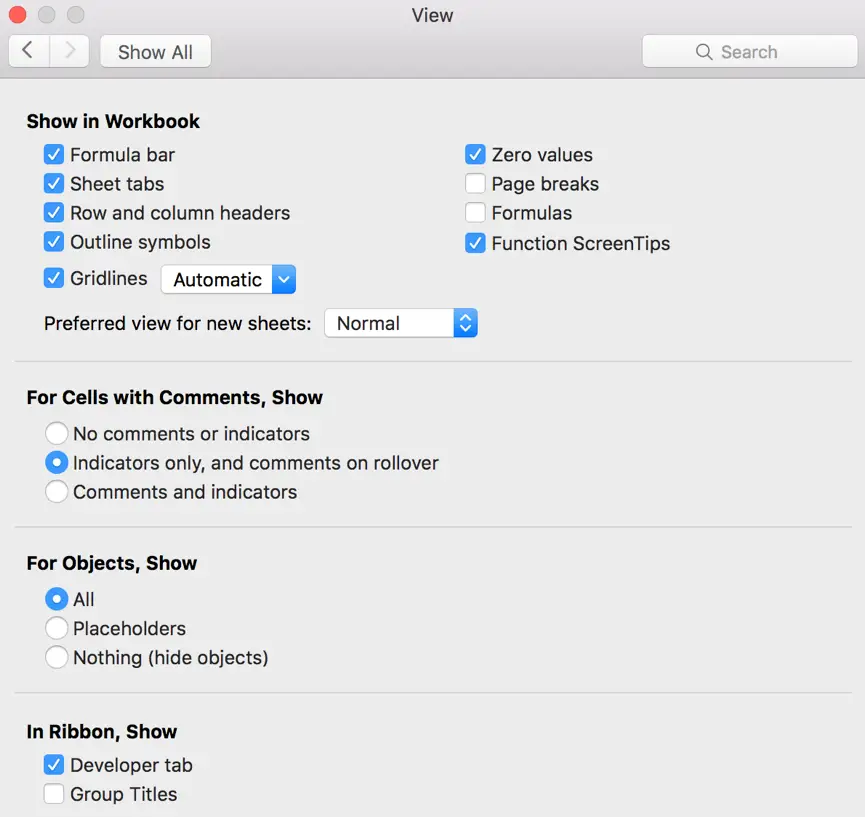
d. Then you can find Developer is displayed in your tool bar. The steps are based on Microsoft Excel 2016 for MAC OS. If you have different versions for Excel on other OS like Windows, you may find Developer in Excel Options.

Step 2. Now we already enabled Developer tab. So click on Developer->Button, this step is used for creating a button, and we will assign a Macro for this button latter.

Step 3. After clicking on Button, use your mouse to select any area on current sheet to create a button. The button size depends on the area your mouse selected. After releasing your mouse, Assign Macro window pops up.

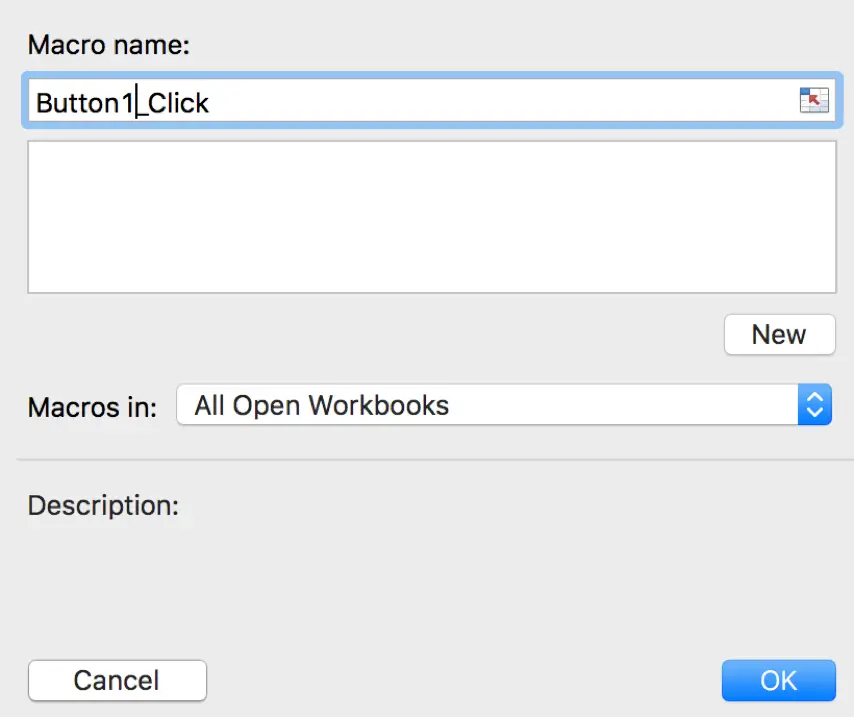
In this step, Excel will assign the button a Macro after creating the button by default. If you already have existing Macros, you can enter its name into Macro Name or select one from Macro list, click OK to assign this Macro. Then when you clicking on the button, it will call the Macro. In above screenshot, Macro1, Macro6 and Macro7 are existing Macros, if this is your first time to use Macro, there is nothing listed, see below. Just click on OK, then a button is created without any related Macro.
Step 4. Edit the button name by right click on it, select ‘Edit Text’. Or you can double click on the button to update button name directly. In this article, we name it Update.
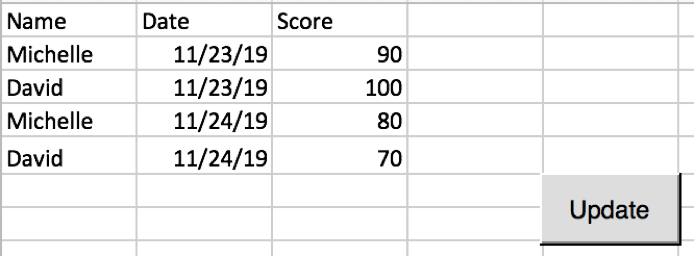
Now we have an Update button.
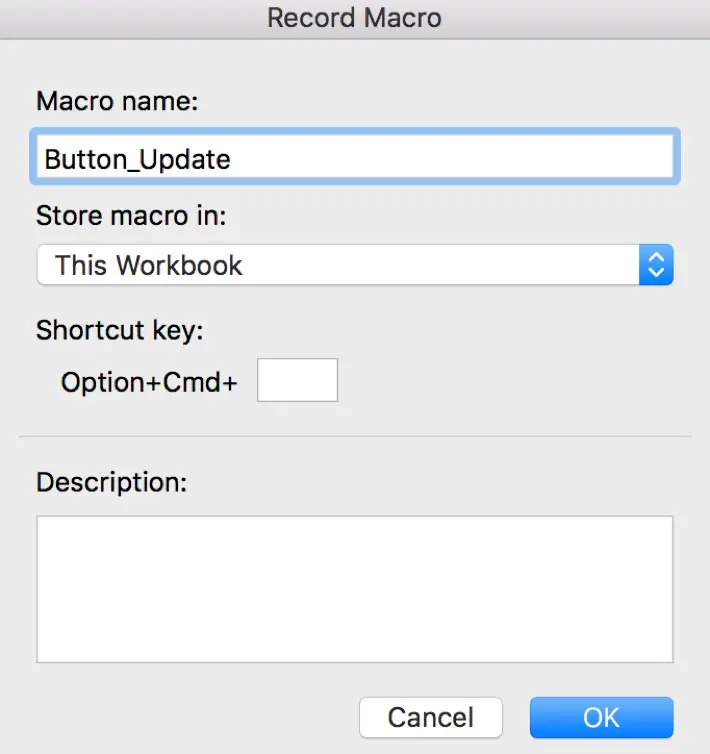
Step 5. Preconditions are done now. Let’s record a Macro. Click on Developer->Record Macro.

Step 6. In pop up Record Macro window, enter Macro name, we name it Button_Update. Then click OK.
Step 7. In the left corner of bottom, we can see there is Ready with Macro icon.

Step 8. Click on Macro icon, then we start to record our Macro.
a. Select on Column A,B,C.
b. Click on Data->Filter, Filter arrow is displayed on cell Name\Date\Score.
c. Click on Filter arrow on Name, then only check on Michelle (which is need to be saved into copy sheet.), close filter name window. Now only rows showing Michelle’s scores are loaded.
d. Copy these rows into copy sheet Michelle.
e. Go back to MAIN SHEET. Click on Data->Filter to clear filter. Now hidden rows for David are displayed again.
Step 9. In step#8, we do a complete record for Macro Button_Macro. Click Stop icon in the bottom to stop record.

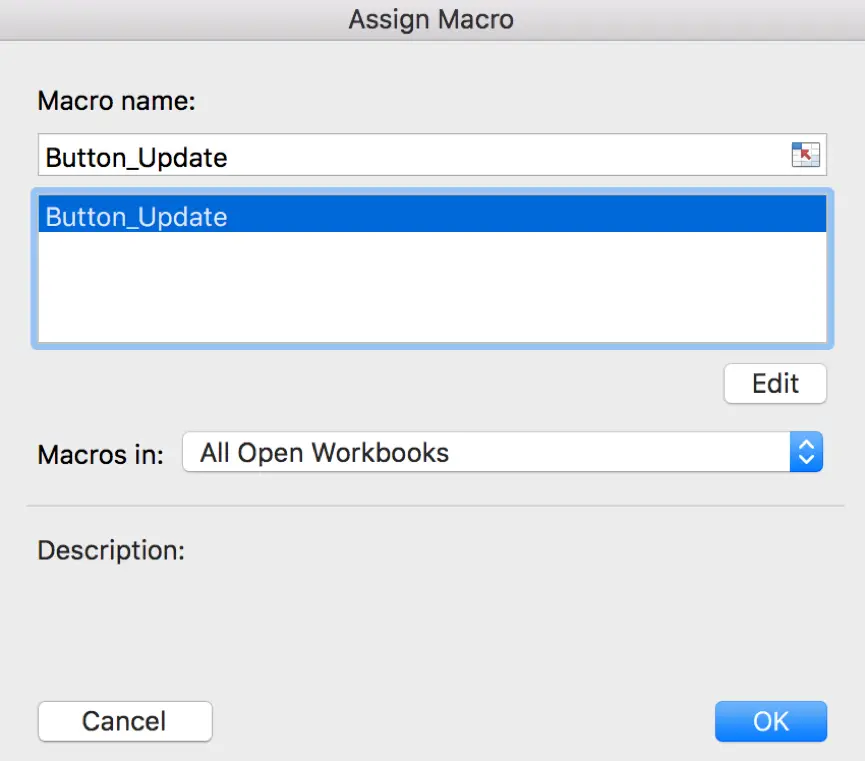
Step 10. Assign Macro we just created for button Update. Right click on button Update, click on Assign Macro. Enter Macro Name Button_Update. Then click OK.
Step 11. Now we can test if button Update can implement our expectation.
a. Insert a new row of Data for Michelle in MAIN SHEET.
b. Click on button Update.
c. After executing Macro, check copy sheet Michelle.
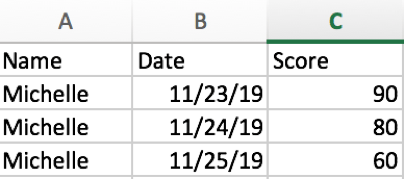
The new entire row is inserted into Michelle successfully. That means Update button is usable.
Notes:
1. Sometimes there is no response for Excel when executing Record Macro or Run Macro, just wait for a while and it will recover and continue the following steps.
2. After running Macro, you need to refresh your MAIN SHEET because sometimes it displays improperly like new row with its following rows are invisible.
