Contents:
format excel cells | changing Number format | Alignment format | Font format | Border format | Fill format | cell protection
A Cell can be used in a formula to hold different types of data like Numbers, Dates, Currency, Text… This section will guide you how to format cells /set the cell type/create or change a cell reference…
Format Excel Cells
If you want to format excel cells, You can do many things for cells in excel such as: changing Number format, Alignment format, Font format, Border format, Fill format and protection .
1. Cells Number Format
By default, the format of all cells is General number format, and General format cells have no specific number format. So if you want to set the cell content as a Number format, now we can change it via the following steps:
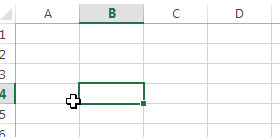
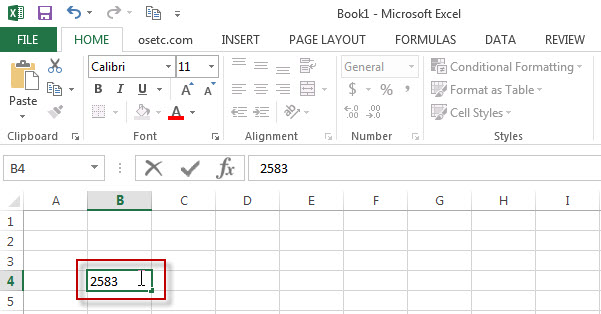
Step 1# Input one value “2583” into one cell, such as: B4
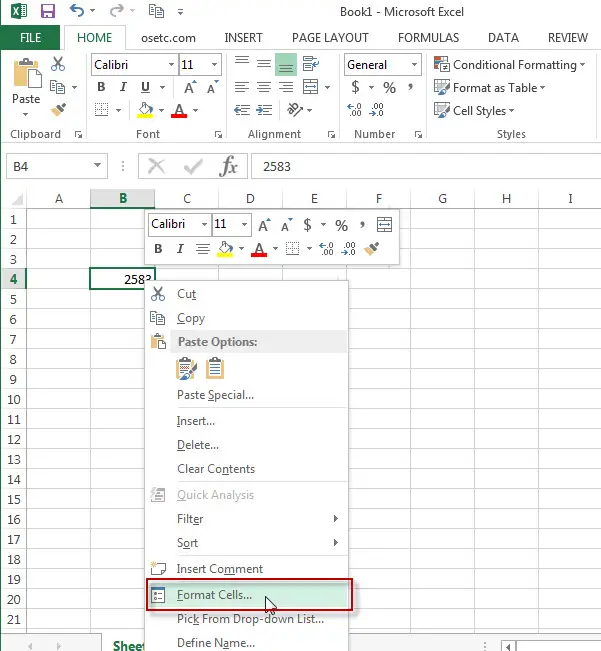
Step 2# select “B4” cell as current cell, then right-click on the B4 cell, click “Format Cells”, then “Format Cells”window appears.
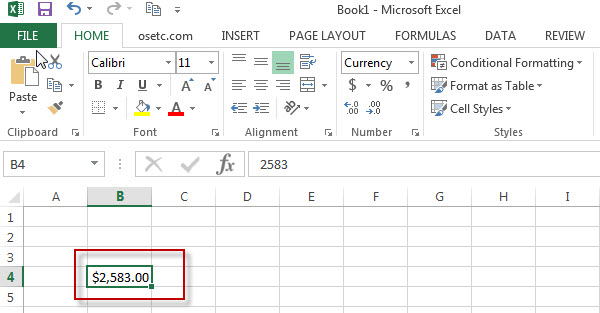
Step 3# Select “Number” tab, then you can select one category in the category ListBox, such as you can select “Currency”, then the value will be formatted as Currency format. The formatting result will be appear on the “Sample” section on the “Format Cells” window.

Step 4# click “OK” button, let see the final result.
2. Alignment Format
If you want to align the text or content in the cell (top, bottom, center), you can set it in the “Format Cells”window or Alignment group in the Home Tab.
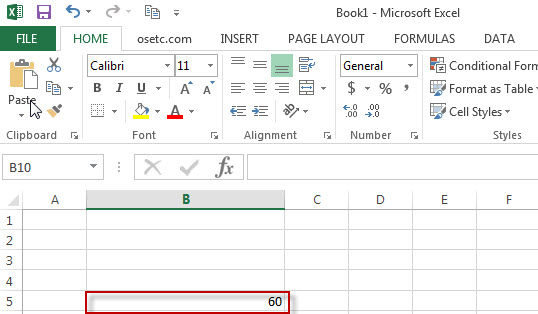
Step 1# Enter one value “60” into B5 Cell
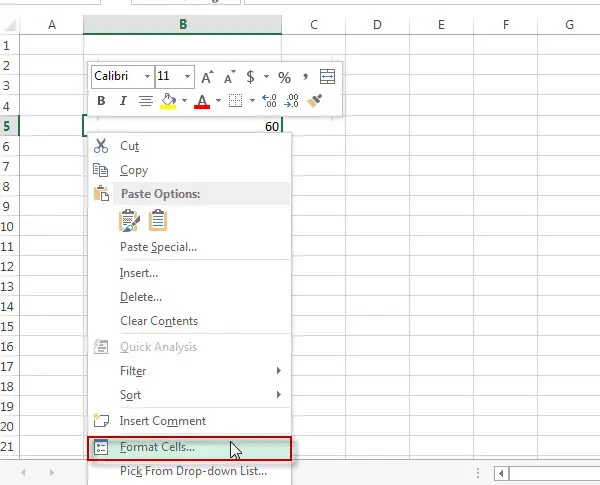
Step 2# righ-click B5 cell and then click “Format Cells” from the popup drop menu.
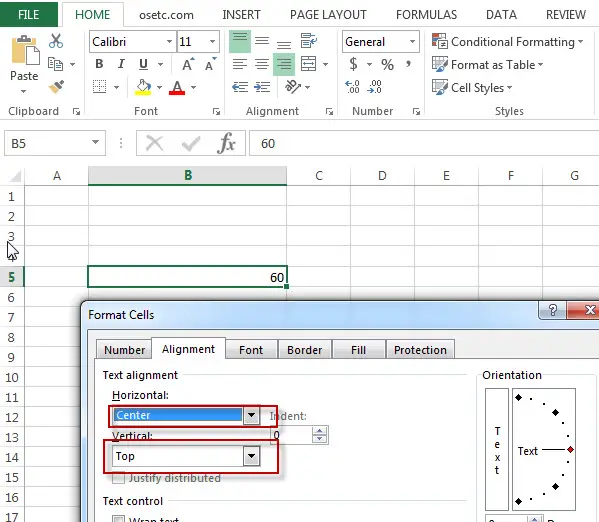
Step 3# select the Alignment tab in “Format Cells” window, then you can change alignment setting via set“top””left””right” or others under Text alignment section.
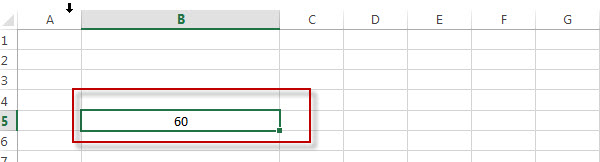
Step 4# click “ok” button, you will see that the text alignment of B5 cell will be align to center position.
Or you can also change the alignment setting of text via alignment group in home tab. Just clicking the alignment command to align what you want to.

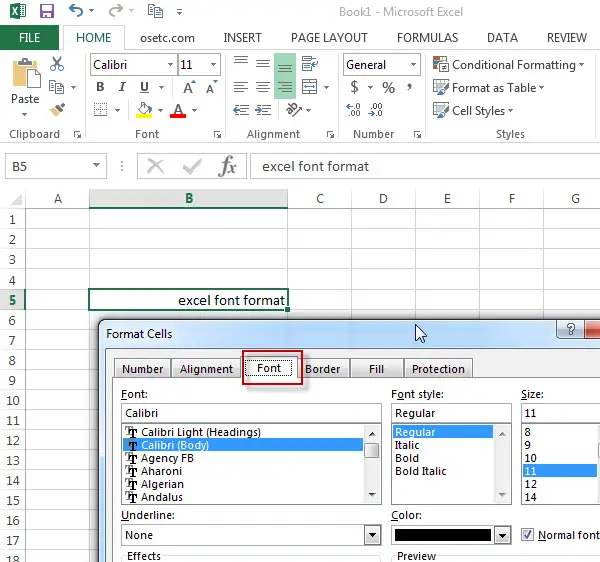
3. Font Format
You can format the text to change font, font color, font size, Font style… Just follow the below steps:
Step 1# Enter into one text value into one cell, then right-click cell and click “Format Cells”, it will show “Format Cells” dialog box. Then Select “Font” tab
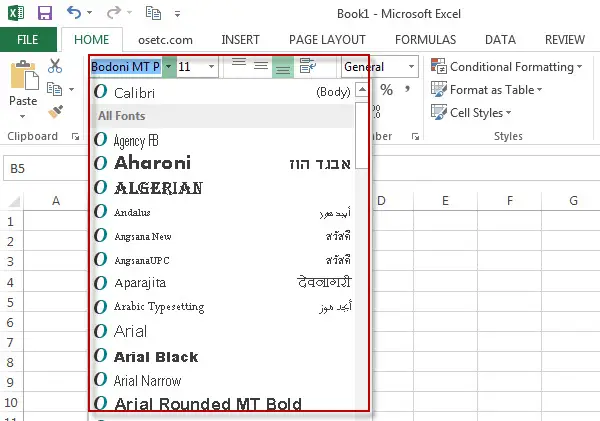
Step 2# To change the Font, just select one font you want to set under Font Listbox. Or click Font Drop-list in the Font group on Home tab.
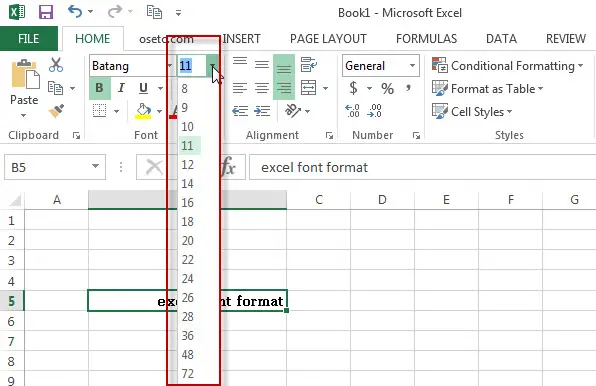
Step 3# To set Font size, just click Font size drop-list in the Font group on the Home Tab or change the font size of text in “Format cells” dialog box.
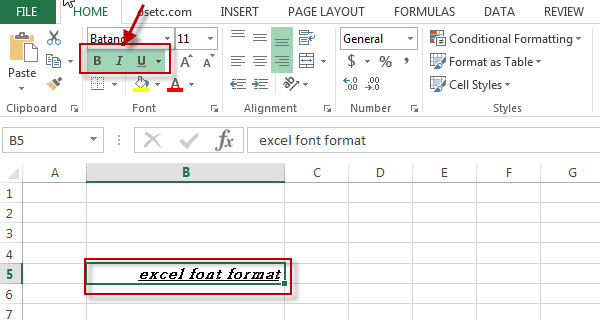
Step 4# There are 4 Font styles that you can set: Regular(default setting), Italic, Bold, Bold Italic. To set Font style, just click “B””I” “U” command in the Font group on the Home Tab. Also can change font style in the “Font” tab of “Format Cells” dialog box.
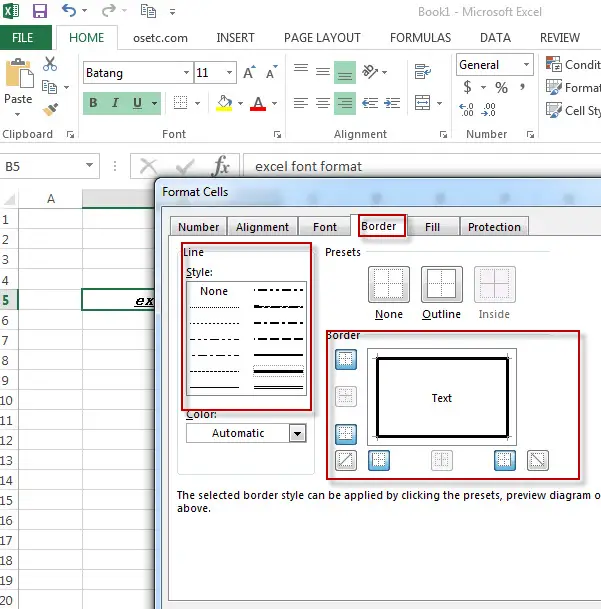
4. Border Format
You can draw a border around a cell or range cells. The below steps will show you how to draw a border.
Step 1# select one cell and then right-click on the cell
Step 2# select “Format Cells” from the drop list. Then “Format Cells” dialog box appears.
Step3# select the“border” tab , then select your line style and the borders that you want to draw.
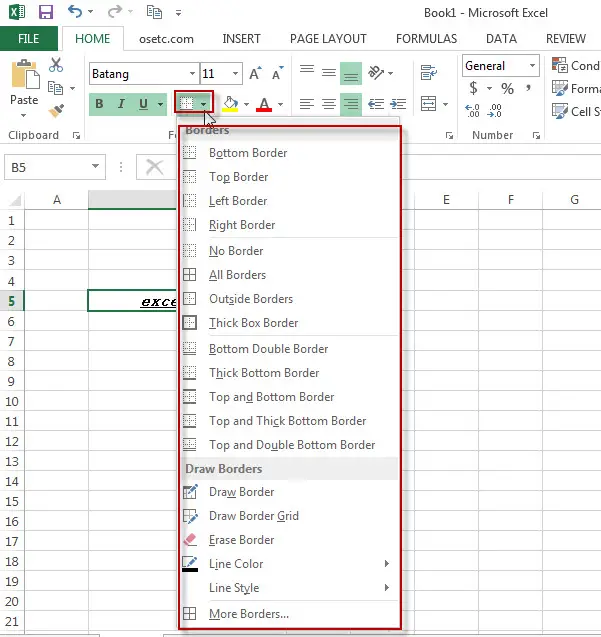
Step 4# you can also click borders drop-list in the Font groups on the home tab.
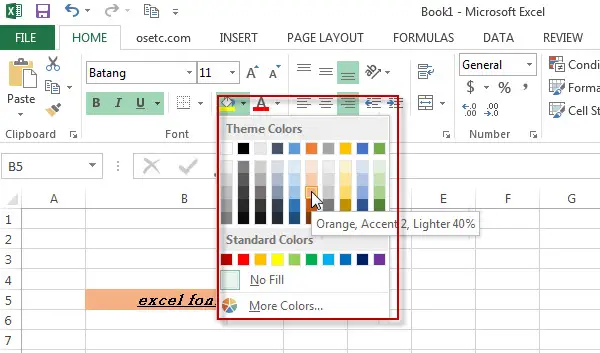
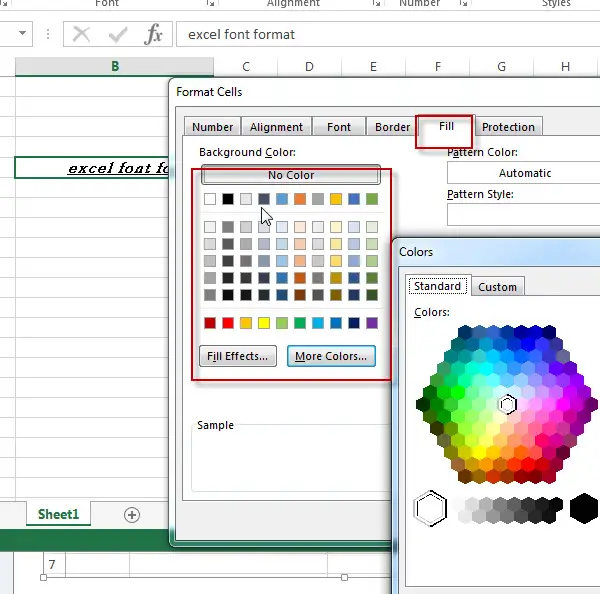
5. Fill Format
To change the background color of a cell, you can click the “Fill color” drop list in the Font group on the home tab or change it in “Fill”tab from “Format Cells” dialog box. See below screenshot:
Or
6. Cells protection
If you want to prevent people from editing locked cells or making formatting changes, just following the below steps:
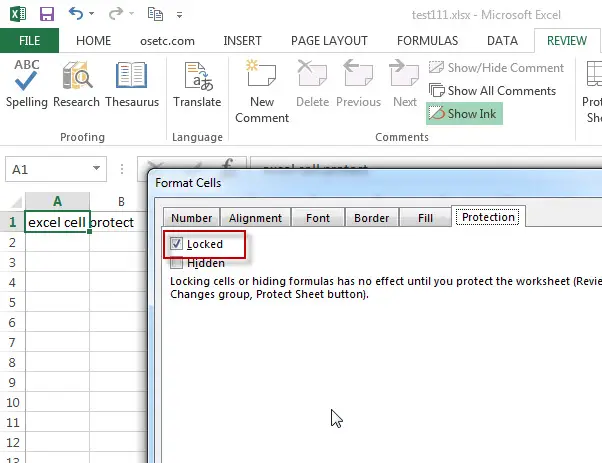
Step 1# select cells or range that you want to protect, Right-click and then click “Format Cells”, “Format Cells” dialog box appears.
Step 2# clicking “Protection”tab, just check the “Locked” checkbox. Click “OK” button.
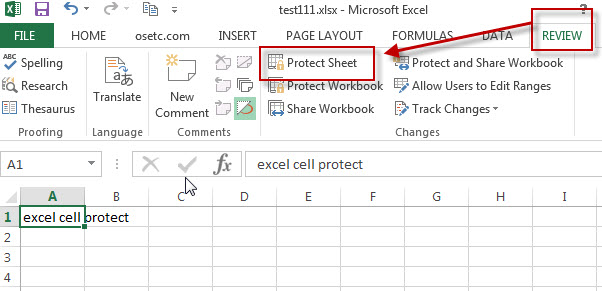
Step 3# Go to “REVIEW” Tab, then click “Protect Sheet” button so that locking of the cells can be take effect.
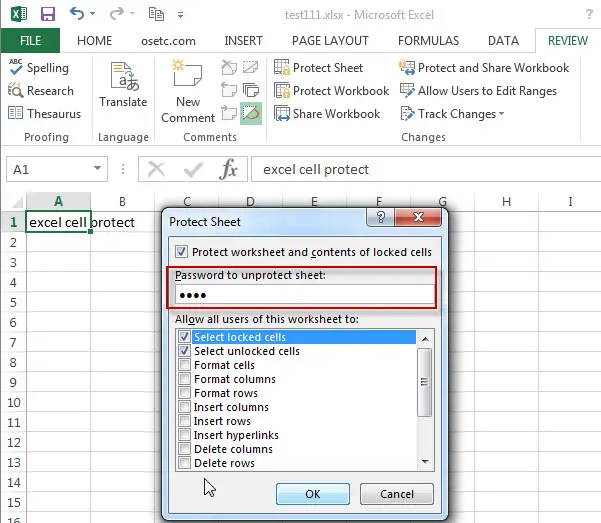
Step 4# “Protect Sheet” dialog box will appear. Then Enter one password in the password text box in “Protect Sheet”window.
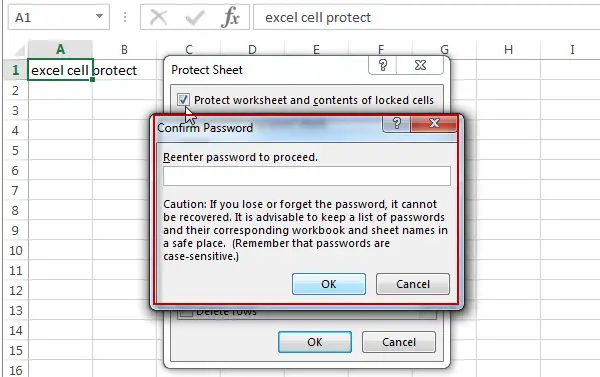
Step 5# Confirmed password need to be input.
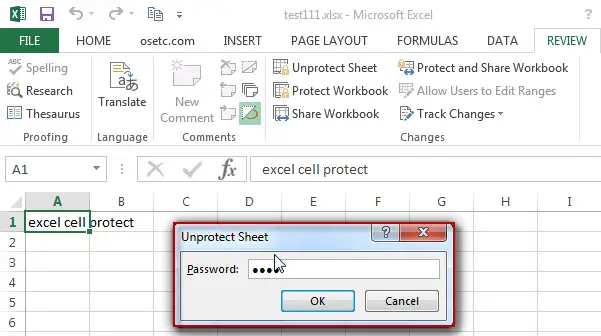
Step 6# At this time, if you want to make changes, you need to click “Unprotect Sheet” button in “REVIEW” tab, then one password need to be input in the “unprotect Sheet” diagbox.
Leave a Reply
You must be logged in to post a comment.